Cotton Kantha Shawl Vest — Vogue 1808

My favorite kind of sewing is to wing it, making things up as I go - challenging and fun. I’ve been photographing our new collection of cotton kantha shawls, loving the soft feel and luminous - sometimes unexpected - color combinations. These are made from old cotton saris which have become soft and faded with use. The saris are hand stitched together by contemporary artisans so the entire surface is covered with running stitches and the edges are turned under and finished.
All the shawls measure approximately 36” x 84”. As fabric this would be 2 ⅓ yards of a 36” width. I can see using 2 shawls for a garment that takes more fabric.
Diane Ericson came to visit for a weekend - after 2 years with no at home visiting we were both ready for some creative time together. One of her many super powers is hand stitching, and we had planned to sit out on the deck and chat and stitch - so I needed a project and fast! Diane brought a project that was cosmically coincidentally pieces of cotton kantha someone had gifted her, turned out to be exactly the same kind as the shawls I had been photographing for the website over a period of weeks. I loved handling them, love the feel and the mix of colors.
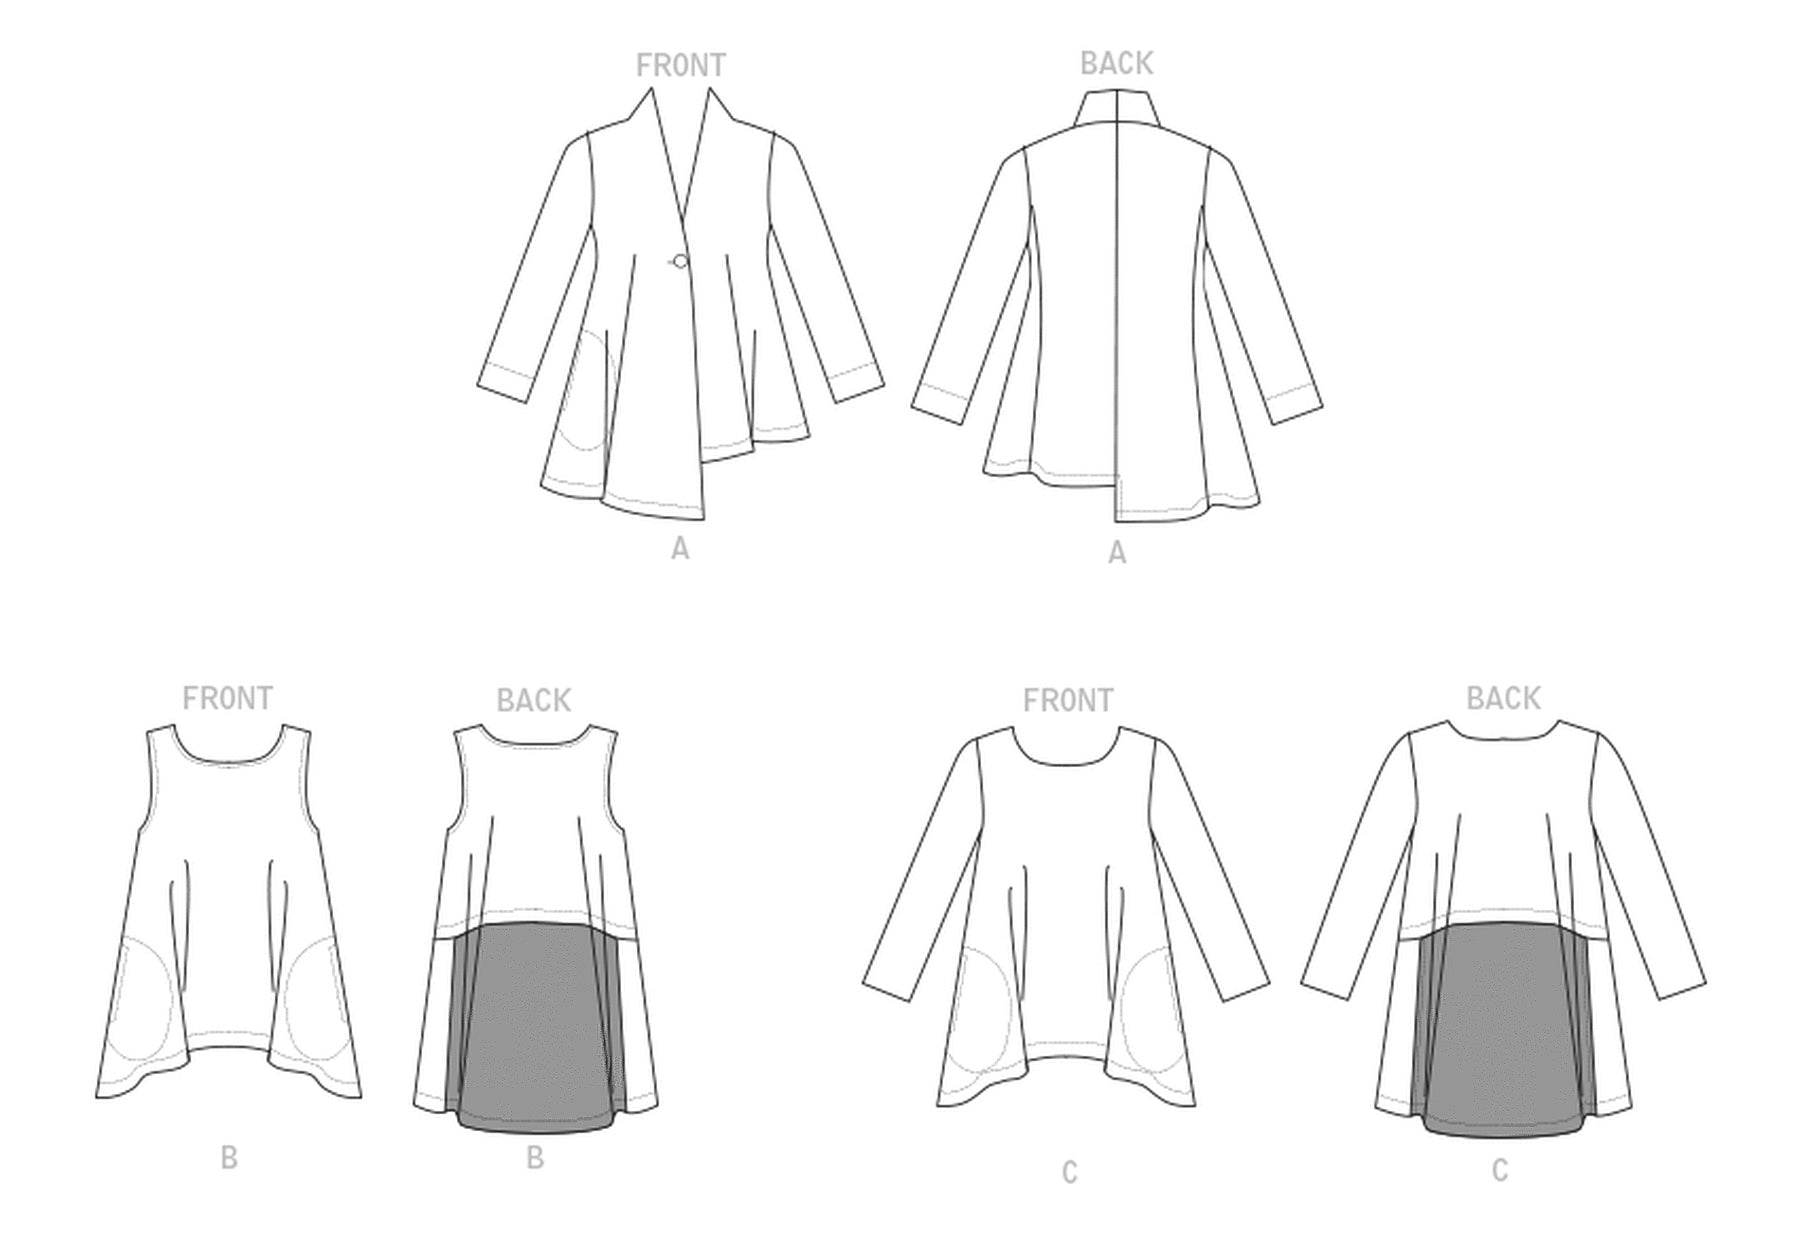
So, I dove into the basket of shawls, pulled one out and set to figuring out what to do with it. Had a couple of false starts, finally settled on a vest, then more false starts until I decided to do a hack of the cardigan in Vogue 1808.
I chose the pattern because the front edge extends to the back neck, so I could use the finished edge of the shawl all in one piece. I stitched a scrap over the exposed seam to hide it. I loosely followed the pattern at the center front edge, but had to straighten out the front seam. Diane assured me that it would be OK to break one of sewing’s cardinal rules, ‘do not make a pattern designed for knits using a woven fabric”. So, I did just that. We were hanging out in the studio while I cut, and I used Diane’s wisdom and my sample garment as guides to cutting and placement. I cut with extra ease and was able to place the entire garment on the scarf. In the enthusiasm of the moment I neglected to take any photos…
Tips
Cut the front edge along a finished edge of the scarf.
Added a center back seam, making it 1” wide.
Stitched the center back seam to the outside.
Then we went out to the deck and I hand basted the pieces together. So relaxing. Note to self - do more of this! Diane was stitching her entire cotton kantha tunic together by hand - and making it reversible to boot. She and Katherine helped me to fit the vest - ripped and re-basted, then it sat in my studio looking like a heap of rags until yesterday.
Back at the machine…
All the shawls measure approximately 36” x 84”. As fabric this would be 2 ⅓ yards of a 36” width. I can see using 2 shawls for a garment that takes more fabric.
Diane Ericson came to visit for a weekend - after 2 years with no at home visiting we were both ready for some creative time together. One of her many super powers is hand stitching, and we had planned to sit out on the deck and chat and stitch - so I needed a project and fast! Diane brought a project that was cosmically coincidentally pieces of cotton kantha someone had gifted her, turned out to be exactly the same kind as the shawls I had been photographing for the website over a period of weeks. I loved handling them, love the feel and the mix of colors.
So, I dove into the basket of shawls, pulled one out and set to figuring out what to do with it. Had a couple of false starts, finally settled on a vest, then more false starts until I decided to do a hack of the cardigan in Vogue 1808.
I chose the pattern because the front edge extends to the back neck, so I could use the finished edge of the shawl all in one piece. I stitched a scrap over the exposed seam to hide it. I loosely followed the pattern at the center front edge, but had to straighten out the front seam. Diane assured me that it would be OK to break one of sewing’s cardinal rules, ‘do not make a pattern designed for knits using a woven fabric”. So, I did just that. We were hanging out in the studio while I cut, and I used Diane’s wisdom and my sample garment as guides to cutting and placement. I cut with extra ease and was able to place the entire garment on the scarf. In the enthusiasm of the moment I neglected to take any photos…
Tips
Cut the front edge along a finished edge of the scarf.
Added a center back seam, making it 1” wide.
Stitched the center back seam to the outside.
Then we went out to the deck and I hand basted the pieces together. So relaxing. Note to self - do more of this! Diane was stitching her entire cotton kantha tunic together by hand - and making it reversible to boot. She and Katherine helped me to fit the vest - ripped and re-basted, then it sat in my studio looking like a heap of rags until yesterday.
Back at the machine…
Some Tips:
- Machine basted everything together.
- Tried on, looking pretty good at this point!
- Stitched, then serged the side seams.
- Always check the sleeve placement.
- On a vest I prefer that the armhole edge run inside a normal sleeve line, so narrowed the shoulder seam by trimming.
- Used a mid weight black lining fabric, (in cut bias strips), to bind the armhole and neck edge.
- Turned the hem up 1½”, then turned the edge under so the hem is finished.
- Stitched facings and hems by hand.
|
Posted on October 21 2023