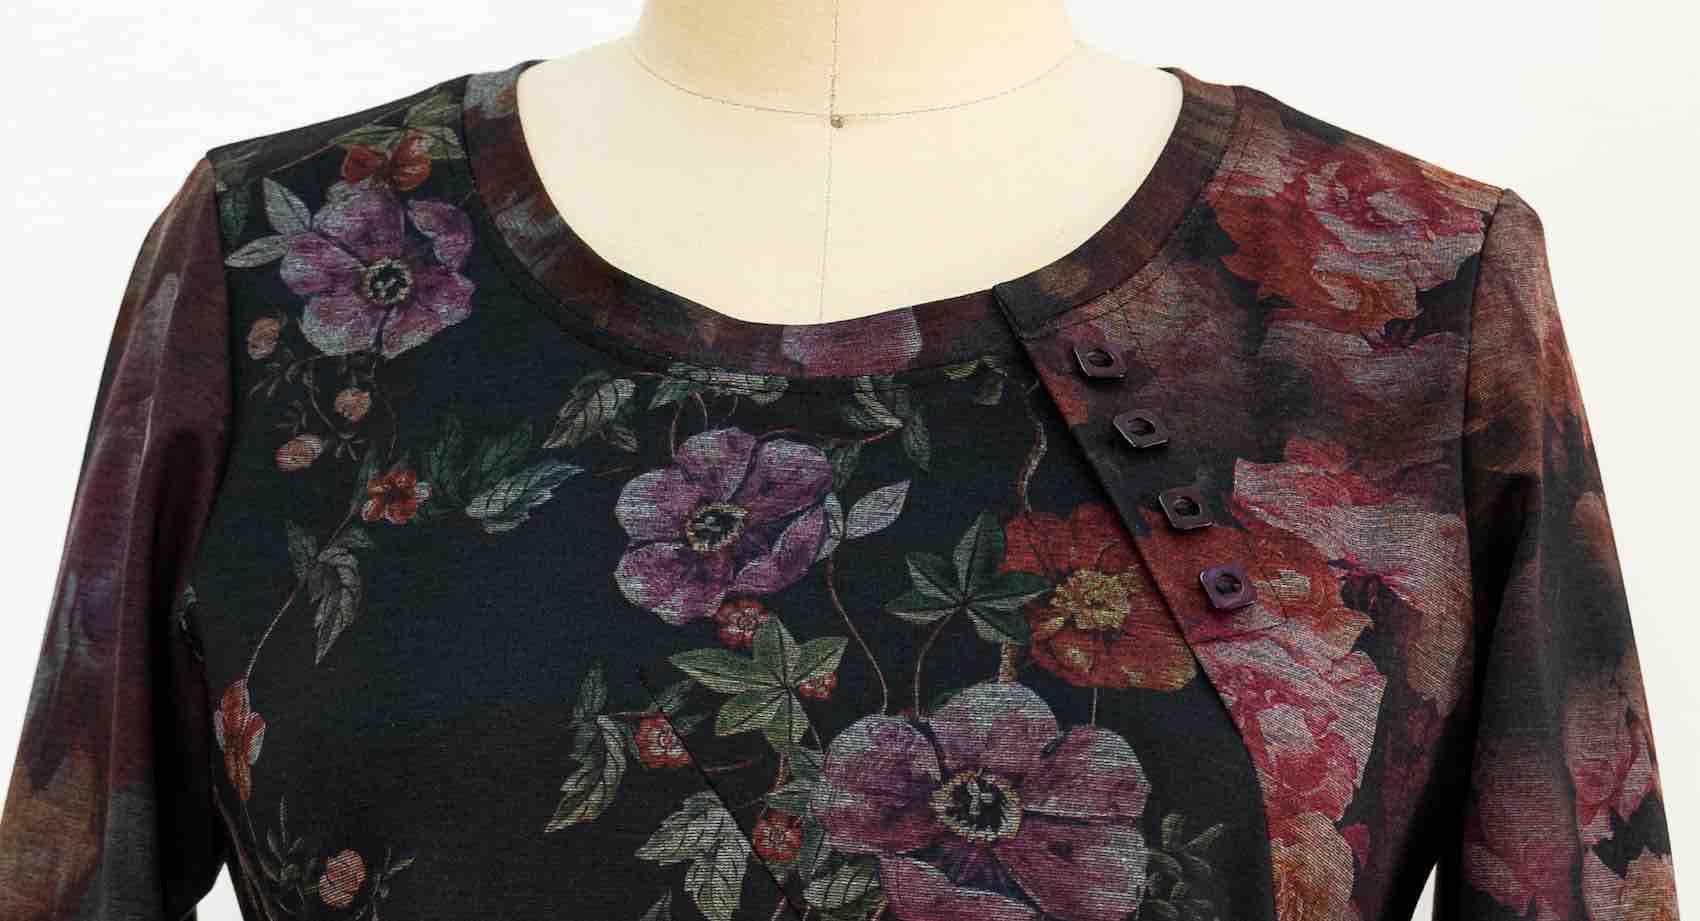
Swirling spiral seams and darts wrap around from front to back in a flattering figure skimming tunic/t-shirt. This is a design that shines on its own and works well for cool weather layering under a jacket, vest or sweater. Fun to execute too, with many design opportunities featuring asymmetrical hems and neckline, optional neck and back vent with decorative buttons and optional raw edge hems. Gwen and I had such a great time working on this design that we kept testing and coming up with design options, and after we were finished with the two variations shown on the pattern envelope, we whipped up a version using color blocking which Vogue did not use on the pattern envelope but which I’m showing here.
Suggested Fabrics include ponte, mid weight jersey, french terry, lightweight sweatshirt fleece, double sided knits
On the pattern envelope:
Floral pontes: I used 3 different prints from our Fall Floral Collection with finished bottom and sleeve hems, neck and back vent secured with buttons, (no buttonholes)


Black and white knit: Uses a stable double sided cotton knit, with raw hem/vent edges, decorative topstitching, neck and back vent secured with buttons (no buttonholes). Double sided knits are a pleasure to work with - no raveling, no seam or hem finish required. Fun to design with too - use raw edges, seams to the outside, lapped seams are just a few ideas to play with.


Color blocked viscose jersey: uses 3 colors in the same weight, has finished hems, plain neckband, color co-ordinated topstitching.


The line drawing shows the details:

Fitting tips
The top is fitted through the bust, then skims the body and you can adjust the fit to flatter your figure.- Tissue fit to make sure the top is the right length and will go around the body at the bust and hip. Take a look at this tissue fitting video to help you get started: INSERT: {https://studio.marcytilton.com/blog/?post=video-custom-fitting-a-t-shirt-pattern}
- Do a Full Bust Adjustment if you need it.
- I always use 1” seam allowances on the side seams as some knits stretch and can affect the fit. On this style, use the wraparound side seams (not the seams on the back). to adjust the fit. It is fine to cut wider seam allowances here and adjust the fit as you sew. Machine baste to fine tune the fit
- Assemble the body of the garment, including the neck placket, and fine tuning the fit before sewing the neck band and sleeves.
- This can be an on-again off-again process.
- At this point, try on the top and check the shoulder seam placement, adjusting if needed. This is one of the most crucial fitting areas, for if the shoulder seam is too wide it broadens the body in an unflattering way, and every knit fabric is different - even if you have already adjusted the pattern and stabilized the shoulder seam.
- If you need to narrow the shoulder, it will usually be at the shoulder seam, tapering to nothing at the notches, and can be adjusted independently at front and back. Working at a full length mirror and a hand held mirror, mark the position of the new seam line with a line of pins. Transfer the marking to the garment, cleaning up the line and making both right and left sides the same.
- Trim, adding the seam allowance! This small adjustment will not affect setting in the sleeve.
Cutting Tips
When using different fabrics for the various pattern pieces, to assure cutting the right fabric, pin small scraps of each print or color to the corresponding pattern pieces. I use a dress form and the fabrics to determine placement, and have been known to cut more than one piece or sleeve if I change my mind.
Construction Tips: I sew the entire garment using a walking foot.
Tips for Raw Edges
- I cut the hem a bit longer, then give the finished garment hem a final clean trim when the garment is finished.
- Use a rotary cutter and ruler to get a clean edge.
- Some fabrics will lie flat, others will roll to the outside (in a good way!).
- Test on your fabric first.
Topstitching
- Use a walking foot to prevent the fabric from distorting.
- Make test samples before working on the garment to determine stitch length etc.
- Much of the success depends on how your machine works with your fabric.
- I used the #6 ‘stretch’ stitch on my Bernina. This is the stitch that goes two stitches forward, one stitch back, resulting in a more dense effect - I used the longest stitch length on my machine.
- Use regular polyester long staple thread and a #70 or #80 needle - whichever needle works best on your fabric.
- Stitch slowly, be patient.
- Use ‘disappearing’ white tailor’s chalk to mark topstitching lines.


