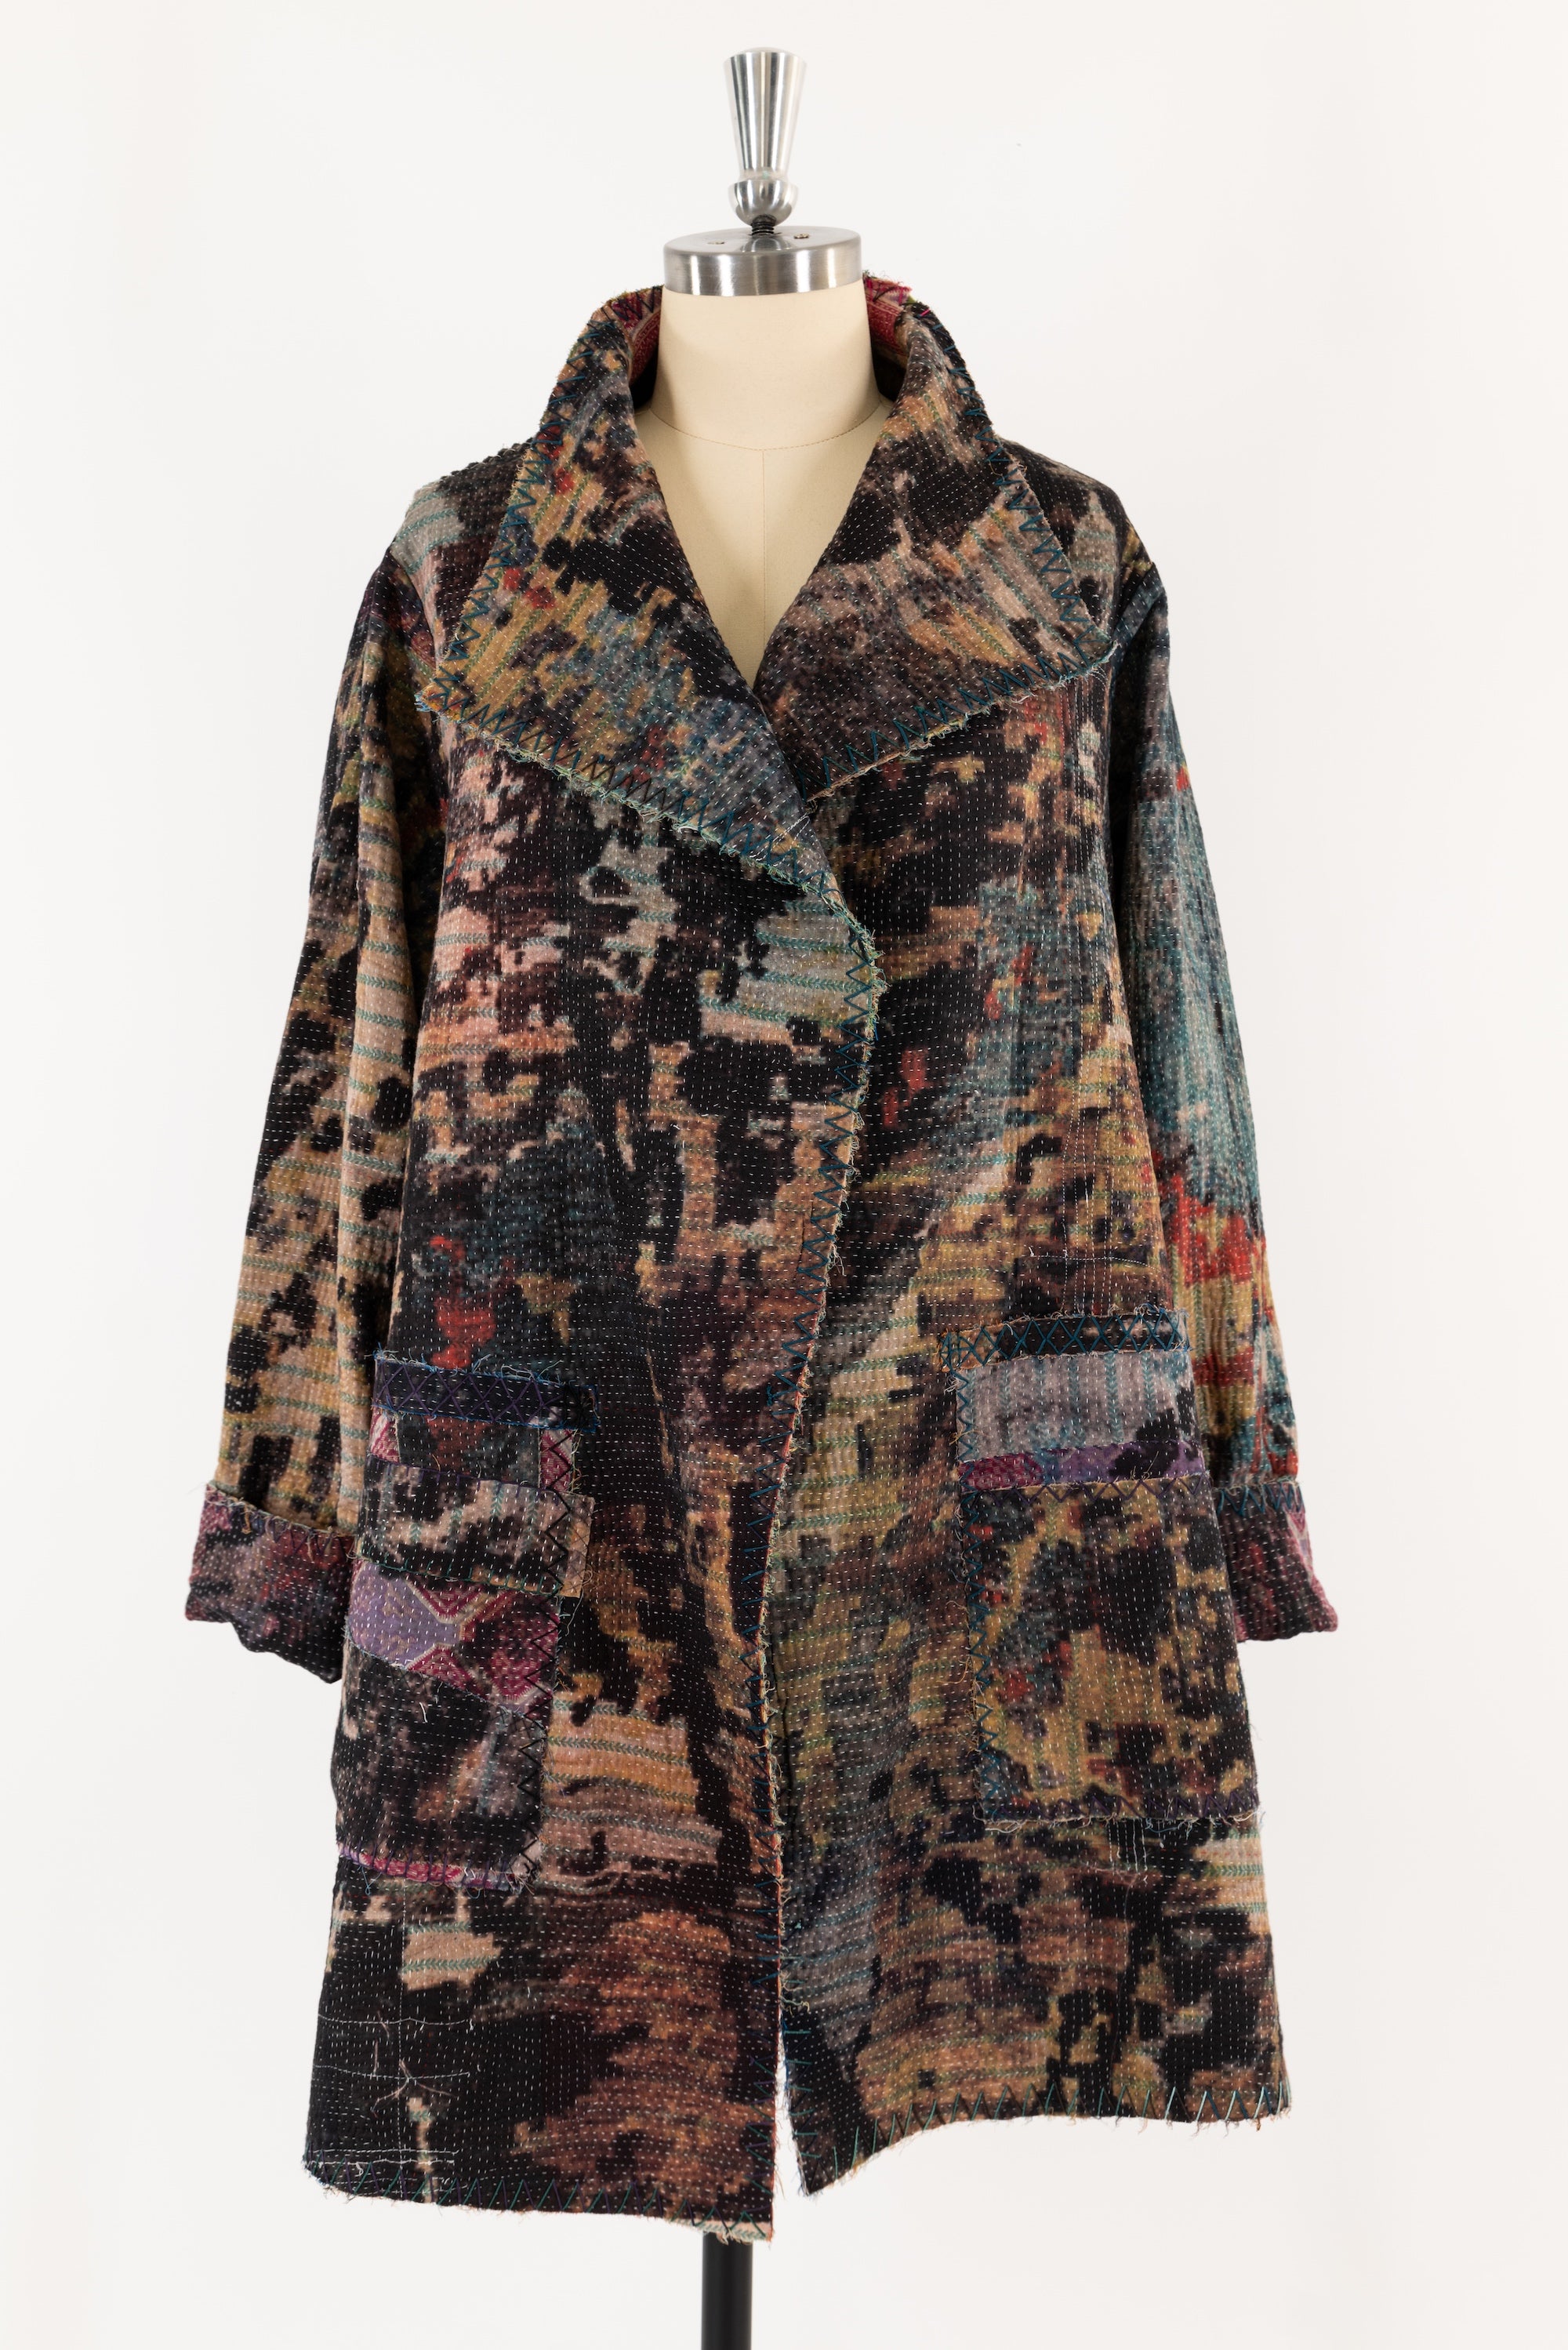
From a source in India we carefully chose a selection of vintage kantha quilts, composed of layers of recycled/re-used cotton saris, pieced, hand stitched (thousands of tiny stitches), then, in some cases over printed and/or over-dyed.
The colors and designs indicate their age, history and the design sense of the maker - made by women for their families. Soft and supple, they feel delicious, the fine overall stitching is appealing to the touch and creates a subtle texture. The colors mix in surprisingly beautiful ways, some bright, some soft.
One kantha from a recent collection called to me to use for a transitional coat.


I modified my coat pattern, Butterick 6919 shown here.


Design and Cutting Tips
- Use the basic shape of the coat, eliminating the curved seams.
- Match/overlay the seam lines, then pin or tape the curves on the front and back to make one back, one left front and one right front.
- Put all the complete pattern pieces out of the envelope and on the design table — this helps to facilitate the layout.
- Lay out all the pattern pieces on the quilt, moving them around to make best use of the quilt design.
- Make sure you have a left and right side for the two fronts and sleeves!
Sewing Tips
- Side seams and sleeves are stitched on the machine to secure.
- ALL the other seams: facings, edges and hems are sewn by hand.
- I used the facings all the way around: back neck, front edges, lower hem and sleeve hem.
- Facings are placed wrong sides together and stitched together by hand.
- I kept the hand stitches simple: a double overcast stitch around all the edges. This is a simple overcast stitch but going in 2 directions which forms a V and nicely covers the raw edge. This means I go around all the edges twice, once in each direction.
- Patch pockets were collaged and hand-stitched with fabric scraps and then hand stitched to the coat front.
Hand Stitching and Threads
- I use a variety of embroidery threads from DMC, Valdani and any other interesting yarns I can find.
- I usually use a #9 embroidery needle with an eye large enough to to accept whichever thread I am using.
- The thread and needle depend on which color thread I have on hand and want to use. (I lose and find so many needles that I often use whatever one is near.)
Can’t wait to bring my kantha coat to Paris with me, keeping me chic and cozy as the temperatures drop along with the leaves.
Happy sewing!


