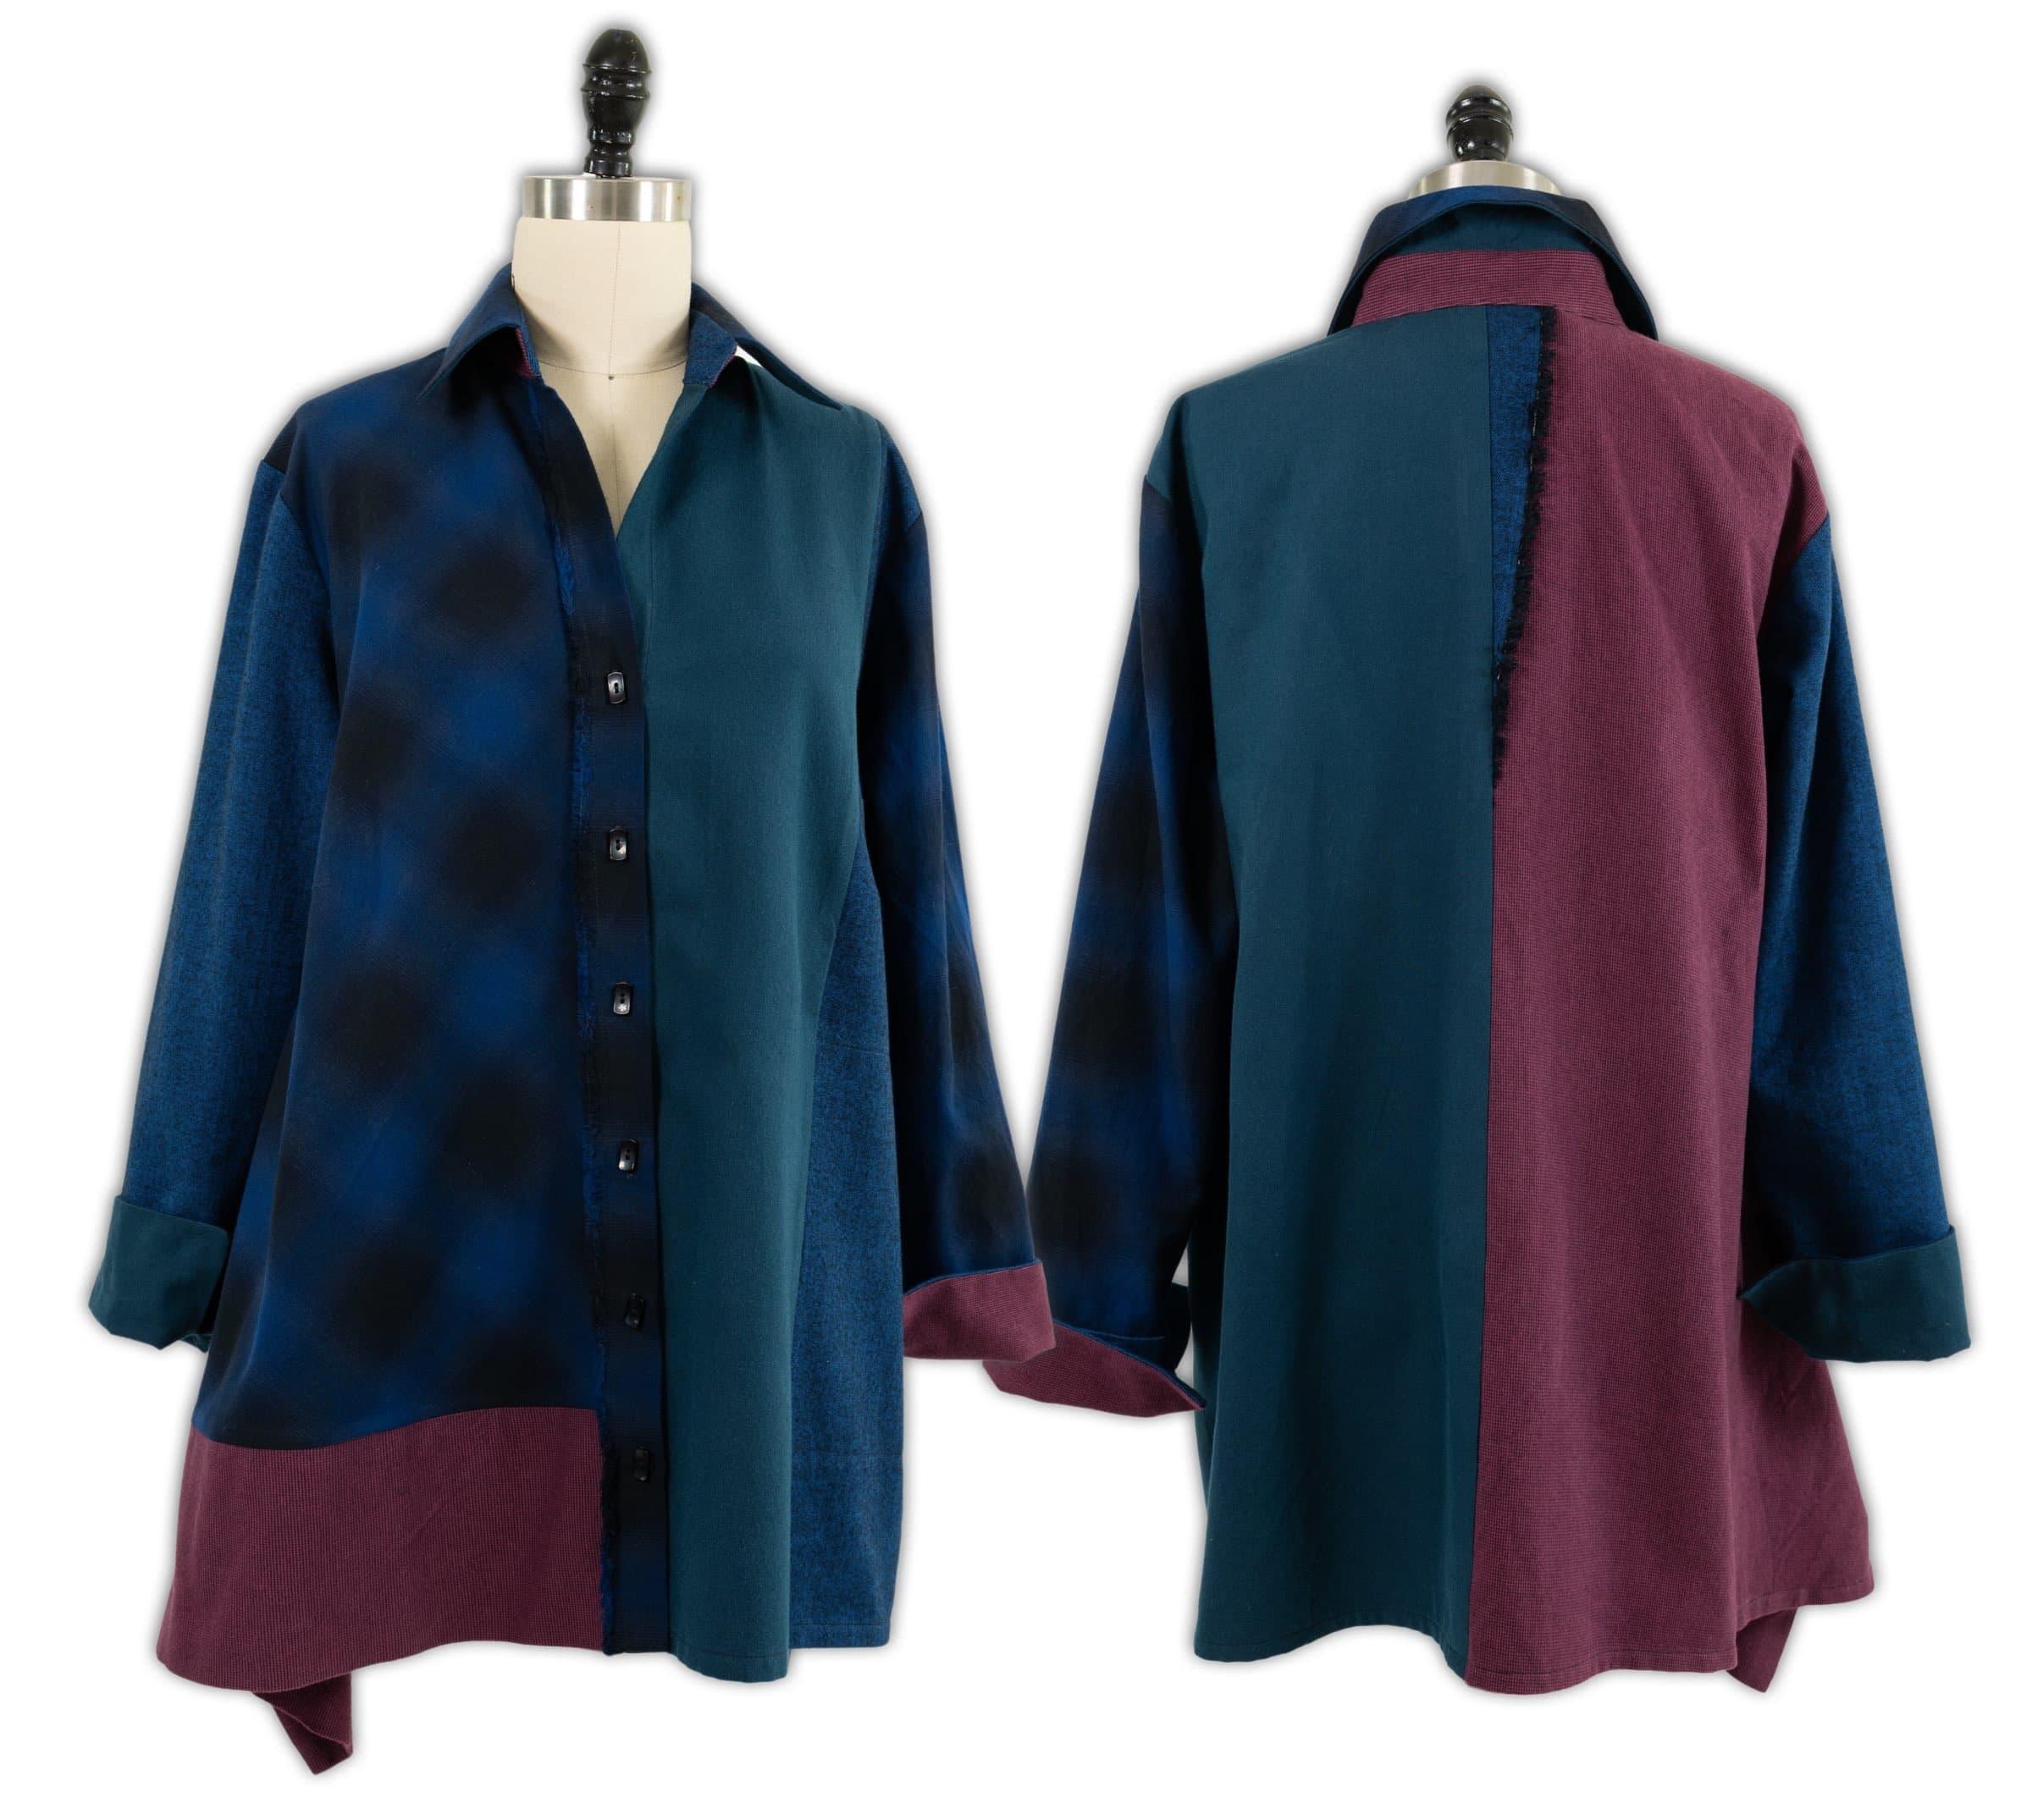
In this iteration I chose 1 yard (2 units) of 4 different cozy cotton flannels from MarcyTilton.com:
- Cobalt Herringbone Flannel
- Blue Canard Flannel
- Madison Square Flannel
- Plummy Flannel

Tips on the order of cutting and stitching together:
- Lay out the pattern pieces for the main body of the shirt, including the sleeves.
- Consider color, proportion/amount of each color and placement of each color.
- Tentatively decide which fabric is going on which pattern piece. I tape small pieces of fabric to each pattern piece to help me visualize.
- Start by cutting out the front pieces, pin together and check out how they look in the mirror. If something doesn’t work, re-cut that piece. On the first cut, Plummy somehow ended up on the left center front, which didn’t look right to my eye, so I re-cut that piece in Blue Canard and moved the Plummy to the right lower band. Much better.
- Cut out the back pieces.
- I try to not have the same fabrics next to each other unless it is the front facing piece. In this shirt the right front was cut from Madison Square on the bias* and the facing was cut from Madison Square on the straight grain, utilizing the selvage as a decorative element. I liked that it was different yet blended while defining the center of the shirt.
- An irregular scrap of the Cobalt Herringbone selvage edge was inserted in the center back seam just for fun.
- Add pockets to the fronts if desired. I always want a pocket in my shirts.
- Then stitch the fronts and back together and stitch up the side seams.
- Next choose which fabric to use in each sleeve and the sleeve ‘cuffs’. Here I used a simple turn back cuff with a slit (see Vogue Sewing, revised and updated).
- Last, decide on colors for the collar and collar stand.
- Cutting and stitching, making and shifting decisions as you go helps in creating a successful design.
- Bias — when working with a densely woven pre-washed cotton like these beautiful flannels, I throw caution to the wind and cut some pieces on the bias. I have done this with many different tightly woven cotton shirting fabrics with success (so far). Always pre-wash and dry before cutting.
I use these techniques with differently colored solids and differently patterned fabrics. In this version, each of the flannels has a slightly different weave — a twill, a herringbone, a plaid and a tweed. Yet even with different colors in the weave, they ‘read’ as solids.
Happy sewing!


